Showing posts with label Whole meal flour. Show all posts

Monday, 24 August 2015

Mexican Cemita Buns


 Mexican Cemita Buns were made for are We Knead To Bake #30. Thanks to Aparna for introducing new sandwich buns. As name suggest, it’s quite popular in Puebla, Mexico. 

Though it’s slightly sweet Crackly thin crust with sesame seeds toppings, still perfect for sandwich. This is sort of a cross between challah and brioch.


Original recipe is adopted from here. As usual, I go with all purpose flour & whole meal flour combination with just three servings, instead of six.  I kept my figure crossed because, wanted the bun should rise like a ball and sponge. Usually the all purpose flour & whole meal flour, may not give a good rise and airy / sponginess, like the original. but, Cemita Buns turns out the way I wanted, I am glad.

Ingredients:     1 cup of all purpose flour    ;  ¾   cup of whole meal flour      ;     ¼  cup of warm milk      ;     ¼  cup of cream     ;       1 egg       ;      ½ tsp of instant yeast      ;        1/2 tsp salt        ;        ¾ tbsp. of sugar       ;      milk for brushing     ;  sesame seeds to sprinkle on top.


Combine (both) all the flour, the cream, milk, egg, yeast, salt, and sugar with the  food processor, until a ball of homogenous dough that rides around the blade is formed. Make sure the dough should be in a very sticky consistency. 

Transfer dough to a greased bowl and cover it with damp cloth and leave it at room temperature for about 2 hours until it is about 1 1/2 times its original size.

Dust the working surface and lightly flour the dough. Gently  press down the dough and shape it into a thick “rope” like shape. Cut this into 3 equal portions with a scraper.


Shape the balls into smooth rounds by stretching the tops to form a smooth “skin”. Place them on a parchment lined baking tray, leaving a little space between them for expanding as they proof. Cover again and set aside at room temperature for 45 - 60 minutes or until they have risen a bit.

Brush the buns with milk and sprinkle the tops with sesame seeds. Gently press them down into the dough. Bake at 230°C  for about 15 minutes until they’re done and the tops are a deep golden brown.


Cool them completely on a wire rack.  Prepare your sandwich of your choice, I am sure you will enjoy.

Friday, 22 August 2014

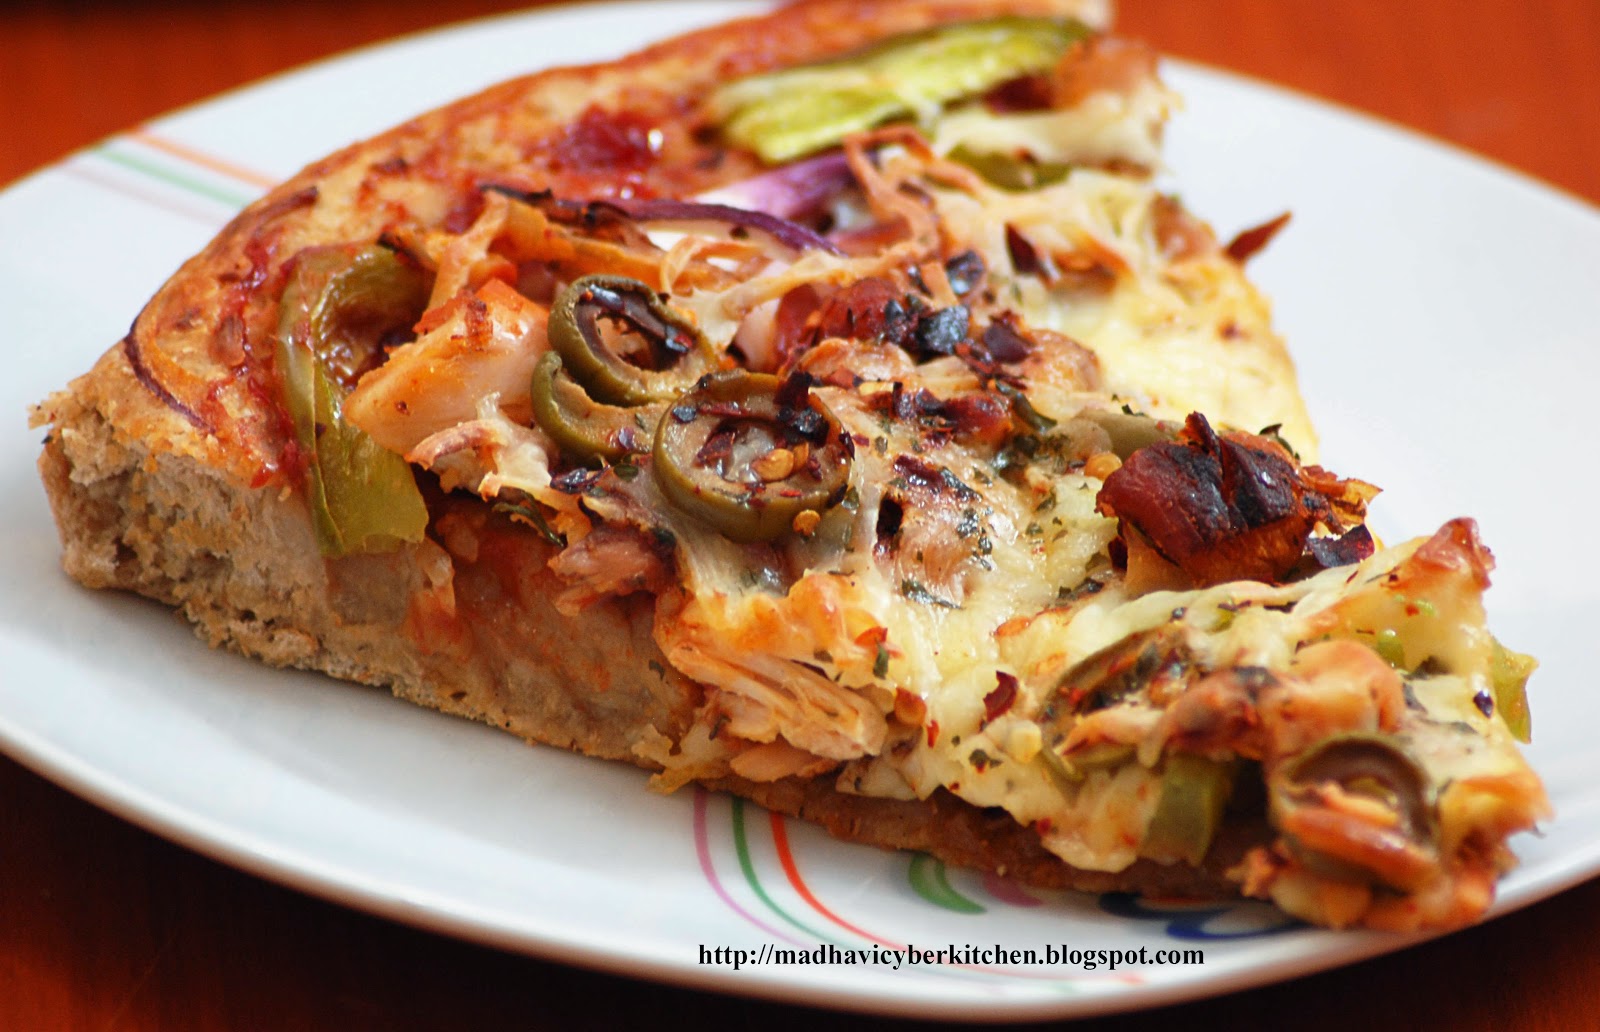
Whole Meal Flour Pizza with Grilled Chicken


I try my best to avoid disappointing my Veggie readers by not posting any meat recipes.  (But, egg is an exemption. Because,  Eggs are one of the basic ingredients in Baking, can’t avoid. However, I have given egg alternatives in the Tips & Tricks page)

But today, I am posting first meat recipe. I can see the smile, in my non-veg reader’s face. 

It’s a revised (non veg) version of my earlier Pizza recipe. The veggies can still read this and Substitute Paneer (Indian Cottage Cheese) for Chicken.  (Both Paneer and Chicken are Rich in Protein) 


Usually, Pizza is made with 100% All purpose flour. Here, we are going for a healthier version.

Ingredients for Pizza base : 2 1/2cup of Whole meal flour   ;    1/2 cup of All-purpose flour  ;   1 ½ cups of  Water    ;    ½ tsp  Sugar  ;       1 ½ tsp  Salt   ;     1 ½ tsp Yeast  ;  1  Egg     ;       1 tbsp  Olive oil    ;  1/4 cup  Pizza sauce.

Ingredients are required for Topping : Onion, sliced 1 medium  ;   half grilled chicken (grilled paneer for Veggies)   ;   Tomatoes cut into thick strips 1medium    ;    Green capsicum cut into thick strips 1 medium    ;   ¾ cup of   Low fat Mozzarella cheese, grated   ;    1 tsp Olive oil    ;    ¼ tsp of  Dry oregano    ;  1tsp  Chili flakes.  

Ingredients are required for Grill chicken :  Chicken Breast   ;   Tandoor masala  ;  2 tsp of Oil   ;   2 tsp of  Curd (Yogurt)    ;      Salt to taste


Grill Chicken Procedure :  Mix Tandoor masala, oil, yogurt, salt well and Marinate the chicken breast for about an hour. (if require sprinkle little water)

Grill the Chicken in Oven till it done. Allow it to cool and chop in to chunks. 

Making procedure of Pizza Base : Mix yeast and sugar with Luke warm water and set aside until it become frothy.  Thanks to the process fermentation 

Add salt, olive oil, egg, meal flour and all-purpose flour to the yeast mixture and kneads into soft dough. 


Leave the dough covered with a damp cloth in a warm place until dough is about double in volume.  It may take about forty five minutes, depends on the atmosphere temperature. Our friends yeast and bacteria, acts much faster in tropical conditions (around 100°F or 38°C).

Divide the (pizza) dough into two equal half, roll out each portion into medium thick discs. Prick with a fork all over. (If you don’t prick, Pizza base raises like a bun while you bake. Resulting, the toppings to fall)

Preheat oven to 220°C... …….Meanwhile, let’s prepare the topping. 


Spread prepared pizza sauce on rolled pizza base, top it with sliced Onion, grilled Chicken chunks, Tomato, Sliced Olives and Capsicum strips. Finally sprinkle grated low-fat mozzarella cheese to evenly cover the pizza top. 

Sprinkle chili flakes on top with olive oil. Place it on greased ovenproof tray and bake in the preheated oven at 220°C until the pizza base is crisp and the cheese melts and starts bubbling.  (May take about twenty minutes) Remove from oven, sprinkle with dried Oregano and serve hot with preferred sauce.


Monday, 21 July 2014

Digestive Biscuit


It had been quite a loooong break. Though my vacation ended as per schedule, my son was at home  and he kept me busy all these days.  Also, summer was in peak, I couldn’t spend much time in my workplace (kitchen). Convincing reasons ? 

Now, I am Back…….! To start with “Digestive Biscuit”. This is not a first time I am making Digestive Biscuit. Earlier, I had a different recipe but, it’s not taste as same as the commercially available Digestives Biscuits. But, you all know.....without chocolate..........

Trust me, this recipe is just perfect one. its is very hard to find that, made at home! and I am happy to share the same.

Digestive Biscuits are originated from U.K. The term "digestive" is derived as these biscuit had antacid properties due to the use of sodium bicarbonate.  (An antacid is a substance which neutralizes stomach acidity). Hence, those who suffer on acidity problem are advised by the Gastroenterologist to have a digestive biscuits in regular interval.

Ingredients :    Whole meal flour  - 1 ½ cup   ;   Oatmeal - 1 ½ cup     ;      Diced cold butter  - 150 gms    ;    Bicarbonate of soda  - 1/2 tsp    ;   Light brown sugar  - 1/4 cup        ;   Salt   -  ½ tsp  ;   Milk  -3-4 tbsp    ;     Chocolate (optional) – 100 gms
Procedure :  Sift together the flour and oatmeal in a Food processor, then rub in the butter until it looks a bit like breadcrumbs.  Now time to add the bicarb, sugar and salt sift again and then add (just enough) milk to bring it together into a coherent dough. Wrap the dough in Clingfilm and chill for 30 minutes.

Preheat the oven to 170°C and line two baking trays with baking parchment. Roll the dough out on a very lightly floured work surface, until about 4mm thick, and then cut out the biscuits in preferred shape and arrange  it in tray.

Bake for 12-15 minutes until golden colour and crisper. Allow it to cool on the tray for 5 minutes before transferring to a rack. 
Meanwhile, melt the chocolate in a double boiler.  Once the biscuits are cool, coat the chocolate lavishly on one side of each biscuit and place it on the rack to dry.

I am sure, you enjoy this “Real’’ Digestive Biscuit.