Showing posts with label Coco. Show all posts

Saturday, 13 August 2016

Mexican coffee buns / Papparoti


I had been there in paparoti couple of months ago, I enjoyed the bun and my Husband enjoyed the coffee. Since then, I wanted to make paparoti bun. I am glad, I could recreate the paparoti bun or Mexican coffee bun in my oven. (cyberkitchen). I adopted the recipe from here. Though the making procedure is bit long, it was all worth it in the end.

Ingredients  for bun dough  :  2 cups of all-purpose flour (sifted)     ;      3 tbsp of sugar   ;     1/2 tsp of salt       ;        1 ½ tsp of instant yeast      ;         1/4 cup of milk at room temp.       ;      1/4 cup milk + ½ tsp of lemon juice    ;     1 egg     ;       3 tbsp of unsalted butter at room temp.  

Ingredients  for topping :   ¼ cup of all-purpose flour     ;    1/8 tsp of coco powder     ;        2 tbsp of soft Butter    ;      2 tbsp of sugar     ;    1/8 tsp of salt     ;     1/2 egg slightly beaten     ;    10ml strong coffee 


Ingredients  for filling   :   12 No’s of 3 – 4 grams of  unsalted butter cubes   (kept frozen) 
Combine lemon juice and milk, stir gently and set aside until the milk precipitate and become a slightly sour mixture. This helps the bun to be richer and fluffier.

In a separate bowl, combine flour, sugar, salt, instant yeast and mix well. Add milk, milk + lemon juice mixture, beaten egg. Mix well until all the ingredients are combined well. Cover the bowl in damp cloth for about 15 – 20 minutes. Knead the dough further, to form sticky elastic dough. (Use some flour to coat your hands if the dough is too sticky)


Add softened butter (not melted) and knead the dough until the butter is incorporated into the dough. Continue kneading until the dough is completely smooth and elastic and should form a thin layer when stretched.

Transfer the dough to a lightly floured tabletop, Gently shape the dough into a ball with a smooth surface. Coat the dough balls with thin layer of oil, to avoid dough from cracking. Place them into greased bowl and cover with damp cloth until the dough become double in size.

Meanwhile, lets do the topping ………………. Combine flour and cocoa powder and keep aside. Add butter, sugar, salt in a mixing bowl and mix until all ingredients are combined. Add egg and continue beating until the butter mixture is completely incorporated. (Over beating may result a spongy texture topping)


Sift flour and cocoa powder into the bowl Add coffee, mix well until smooth and combined. Transfer topping to a piping bag, and keep in the refrigerator. After the dough has doubled in size, deflate the dough, gently knead the dough and divide into 12 small pieces. Take the frozen butter cubes from the freezer.

Gently stretch a dough ball out, press a piece of filling into the dough and pinch edges together. Seal carefully so the filling doesn’t leak while being baked. Roll the bun with the palms of your hands until round and even. Place on baking tray lined with parchment paper or a silicone baking mat. Repeat with the remaining buns. (make sure you leave enough space between the buns)

Cover the tray with damp cloth for a second rise. Once the dough has become doubled in size, do the topping. Remove the piping bag from fridge and start from the middle and pipe a circular swirl outward. Only cover about 1/2 – 2/3 of the bun’s surface, the topping will melt and cover the rest.


Transfer the baking tray into a 180°c pre-heated oven and bake for 15 – 18 minutes or until the top crust is golden brown and crisp. (If the top turns brown too quickly, cover the buns with a piece of aluminum foil and continue baking until done)

Sunday, 8 May 2016

Chocolate roll cake


Last Mothers day, my mother was here with me. But, this year she is in Chennai, so I want to treat her, visually with this rich and lavish cake as mother’s day special. (Needless to mention, she is also sweet toothed like me) 

This is my very first attempt to make a rolled cake & chocolate rose with nail piping. The rose piped, separately by using Ateco 127 rose tip and placed on the cake. (It’s not that bad, isn’t ?)  

Ingredient for Chocolate cake  :     3 eggs       ;        ½ cup of sugar      ;      1/2 cup of all purpose flour        ;       ¼ cup of coco powder        ;           1 tbsp of hot water


Ingredient for Whipped Cream Filling:      ½ cup of heavy cream       ;     2 tsp of icing sugar        ;        1/2 tsp of vanilla essence
Ingredient for Chocolate Ganache  :     150 gms of dark chocolate        ;          100ml heavy cream
Ingredient for chocolate leaves and procedure from here  
Ingredient for chocolate rose, as same as Chocolate Ganache (as above) and procedure from here


In a bowl mix all purpose flour with coco powder keep aside. Add the eggs and sugar large bowl and beat (using electric hand mixer) till it became pale in color. Gradually add the flour into the egg mixture and beat well to get right consistence of the batter. If required add hot water mix.

Transfer the batter into greased shallow baking pan and spread the batter evenly and bake in 180° pre heated oven for about 15 – 20 minutes or until it done.

Remove the pan from the oven and loosen edges with a sharp knife. Sift the icing sugar over the top of cake layer and cover the top with towel and let stand for about 5 minutes. Invert the cake onto the towel and gently roll the cake up in the towel while it’s still hot (Don’t worry about the layer breaks) it should hold together when rolled.) Leave it for about 30 - 40 min


Meanwhile, let’s prepare the Whipped Cream Filling. Beat the heavy cream with vanilla essence & icing sugar until it becomes soft peaks consistency.

Unroll the cake and spread the cream all over and leaving about one inch border all around the edges. Roll the cake again and keep it in the fridge for 30 min.

Meanwhile, let’s prepare the chocolate Ganache. Microwaving the chocolate and cream until it melt and combine. Allow it to cool to room temperature.

Finally, remove the cake from the fridge and pour the ganache on the cake and keep it in the fridge for 30 minutes. Then, using offset spatula shape it to create the wooden log effect. Transfer to the fridge again and serve chill.

I dedicate this cake dessert to all, those who are celebrating their motherhood.


Thursday, 31 March 2016

Giraffe Patch Bread


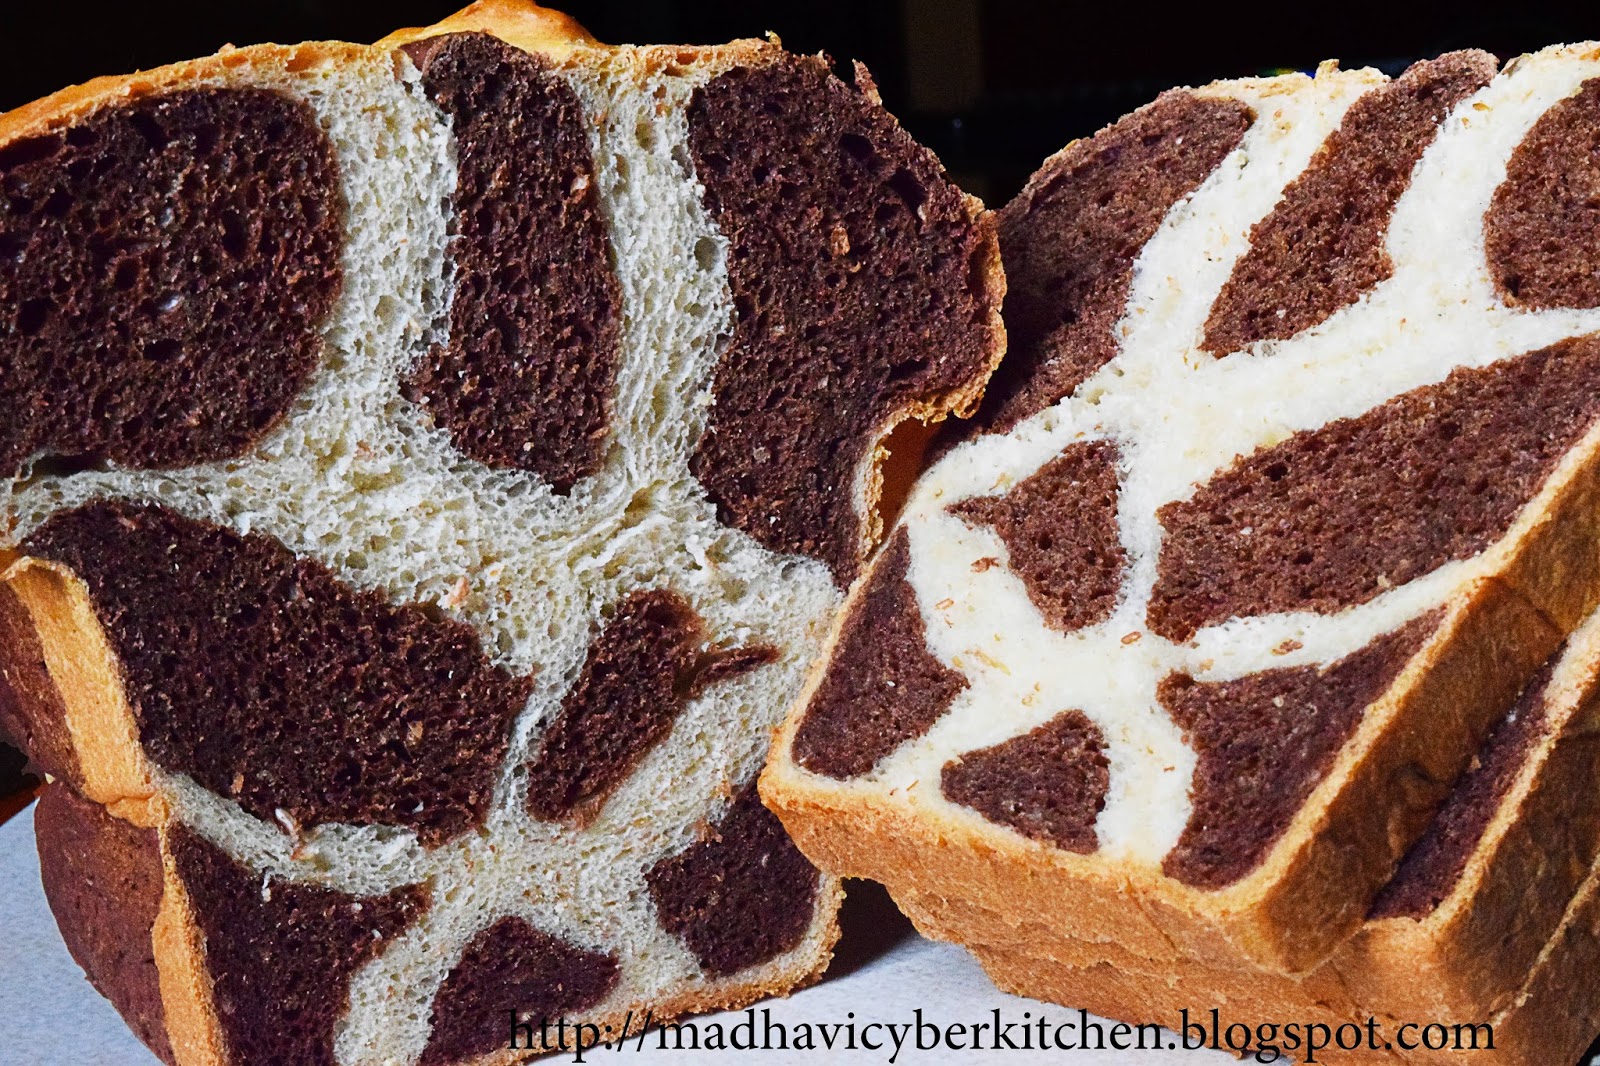
This month challenge at we knead to bake #37 was to create an attractive pattern on the bread. Instead of just baking usual bread, bit of creativity will make the baking more interesting. I wanted to have a Giraffe patch like pattern (very thin white patches on my bread) but, it was not. I know where, I went wrong. My loaf pan is not wide enough to accommodate the dough.

However, it turned out very soft, sponge and good texture bread. The pattern was inspired from here.


Ingredients :     2 cups all purpose flour       ;      1 cup whole wheat flour      ;      2/3 cup of warm milk     ;     1/2 cup of warm water     ;      50 gms of butter melted      ;     3 tbsp of sugar     ;      1 tsp of salt     ;      2 tsp of instant yeast.      ;      4 to 5 tbsp of coco powder dissolved in  3 tbsp of milk  (for the darker brown colored dough)   ;    little oil    ;  little milk for brushing

Procedure :  combine all of the ingredients (except coco powder) in a large bowl and stir until the dough starts to leave the sides of the bowl. Transfer the dough to a lightly greased surface and knead for about 8 – 10 minutes by hand (if required, oil your hands) or until it become smooth and supple.  


With rolling pin roll the dough into circle shape and divide into three equal parts. Take the one part of the dough and place it on the lightly greased bowl and cover with damp cloth and allow it to raise double in volume. (may take about 45 to 60 min)

Take the other two parts of the dough and add the cocoa powder (dissolved in the 3 tbsp of milk) and knead well until to form a uniform colour. (This is the dark coloured dough for the giraffe patches) Shape it into a ball and place it in a lightly greased bowl and cover with damp cloth and allow it to raise double in volume.

Gently deflate the coco dough and then divide into 4 equal portions. With hand roll the dough like rope or sausage shape. You will get 4 same size rope(s) like dough.


Similarly, deflate the white dough and then divide into 4 equal portions. With rolling pin roll the dough into oval shape. You will get the 4 equal oval shapes. Try to make similar length of the coco dough and the width is just enough to cover the coco dough.

Now, place the rope shaped coco dough on the mid of oval shaped white dough and cover the coco dough. i.e enclose the rope shaped coco dough by the white dough and seal the end of the white dough. Gently roll on the dusted work surface to form a rope (like our house hold electrical wire, the inner copper conductor is surrounded or enclosed by a plastic insulator. Just imagine, the coco dough is the copper wire and the plastic insulator is the white dough)

Now, you should have 4 similar length and width rope shaped dough. Just by dividing into two equal half’s (the length depends on your loaf tin) you will get eight pieces of dough roll.
Arrange the dough rolls in the greased loaf tin by placing 3 rolls at the bottom. two rolls over the 3 forms the middle layer and 3 more rolls on the 2 forms the top layer. Cover the loaf tin by damp cloth for the second rise, for about 45 minutes. Brush the dough with milk.


Transfer the loaf tin into a 180°C preheated oven for about 30 minutes or until its light golden brown and done. Allow to cool it on a rack before slicing. Store the bread in a plastic bag at room temperature for several days; freeze for longer storage.

Saturday, 13 February 2016

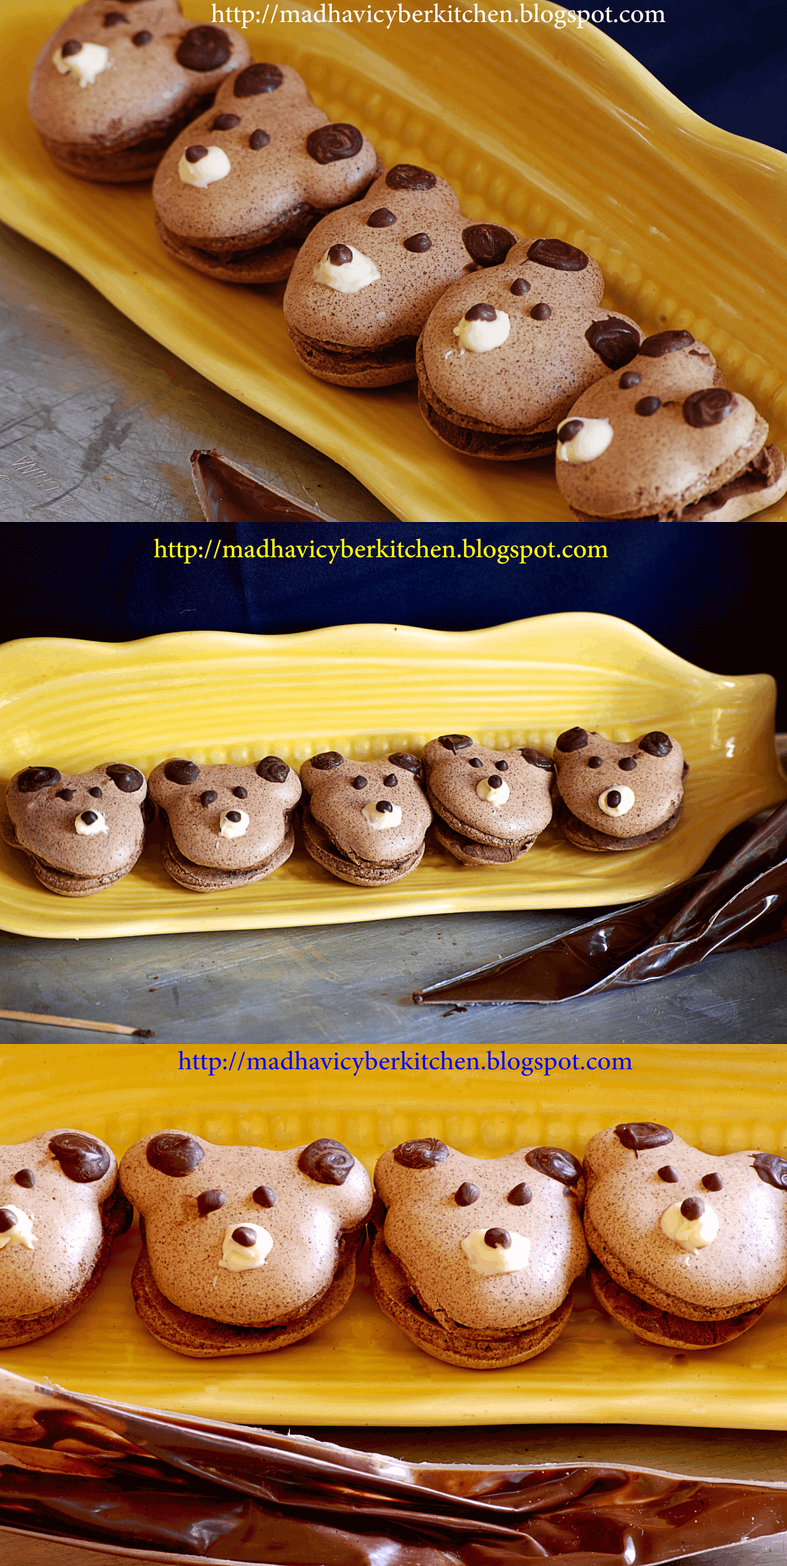
Vegan chocolate macarons


My first macaron post was in 2014. After I didn’t post any because, it’s quite labor intensive and need a good skill to get a right consistency. Otherwise it will be like a cookie.  (My first Vegan sweet recipe is here)

As I mentioned earlier post, two light, fragile, crispy cookies are stacked together with sweet filling like, jam, chocolate or cream.

The major ingredient for macarons is Egg white. But, here the egg white is replaced with chickpeas water. After seeing this vegan at Aileen post,  I could not resist myself and wanted to try and it turns out pretty good, light, fragile, chewy (not crispy) macarons.  (My first Vegan sweet recipe is here)


Ingredients     :    2 cups chickpeas water (soaked overnight, pressure cooked it with water and drain the water )           ;              1/2 cup of light brown sugar          ;         1 cup of almond flour                  ;                   1/2 cup of powdered sugar                ;            1/4 cup of coco powder             ;           1 tsp of vanilla essence.
 
Filling   :    100gms of melted chocolate       ;        1 tsp of coconut oil         ;        2 to 3 tbsp of coconut milk
 
Decoration :  melted white chocolate & chocolate.


In a small saucepan, bring chickpea liquid to a boil.  Simmer the burner and wait to reduce chickpea water to about 1/3 cup.

Meanwhile, combine the almond flour, powdered sugar, and cocoa powder well and transfer the mix into sift. Crush the large chunks if any and sift. Divide the flour mix into three equal parts.

Once your chickpea liquid has reduced, pour it into your stand mixer bowl and whisk at medium speed for about 2 minutes or until to get frothy and foamy. Add brown sugar and beat at high speed for 5 minutes or until the mixture should look like a meringue with stiff, glossy peaks.  

Add vanilla and beat further for 1 more minute. When your meringue is done, add one part of flour mix and fold well and repeat for other two parts. If batter id dry add a teaspoon or two of vanilla into the batter. 


Make sure to get shiny, thick, firm batter consistency. Transfer the batter into the piping bag that attached with half inch hole. Hold the hold the bag upright at a 90 degree angle, and make your own shape or circle shaped macarons on a cookie sheet spread baking tray. Smack the cookie sheets gently few times to release any air bubbles, if any.

Allow the macrons to dry for 45 minutes to 1 hour.  Preheat the oven to 120°c and bake the macarons for about 30 minutes and turn of the oven and allow the macarons to sit in the oven for further 15 minutes and allow cool at outside.


Meanwhile, let’s do the filling mix melted chocolate with coconut oil and coconut milk and using  tablespoon, spread chocolate cream on the on the macron and grab another macarons and sandwich them together.