Showing posts with label Yeast. Show all posts

Friday, 2 December 2016

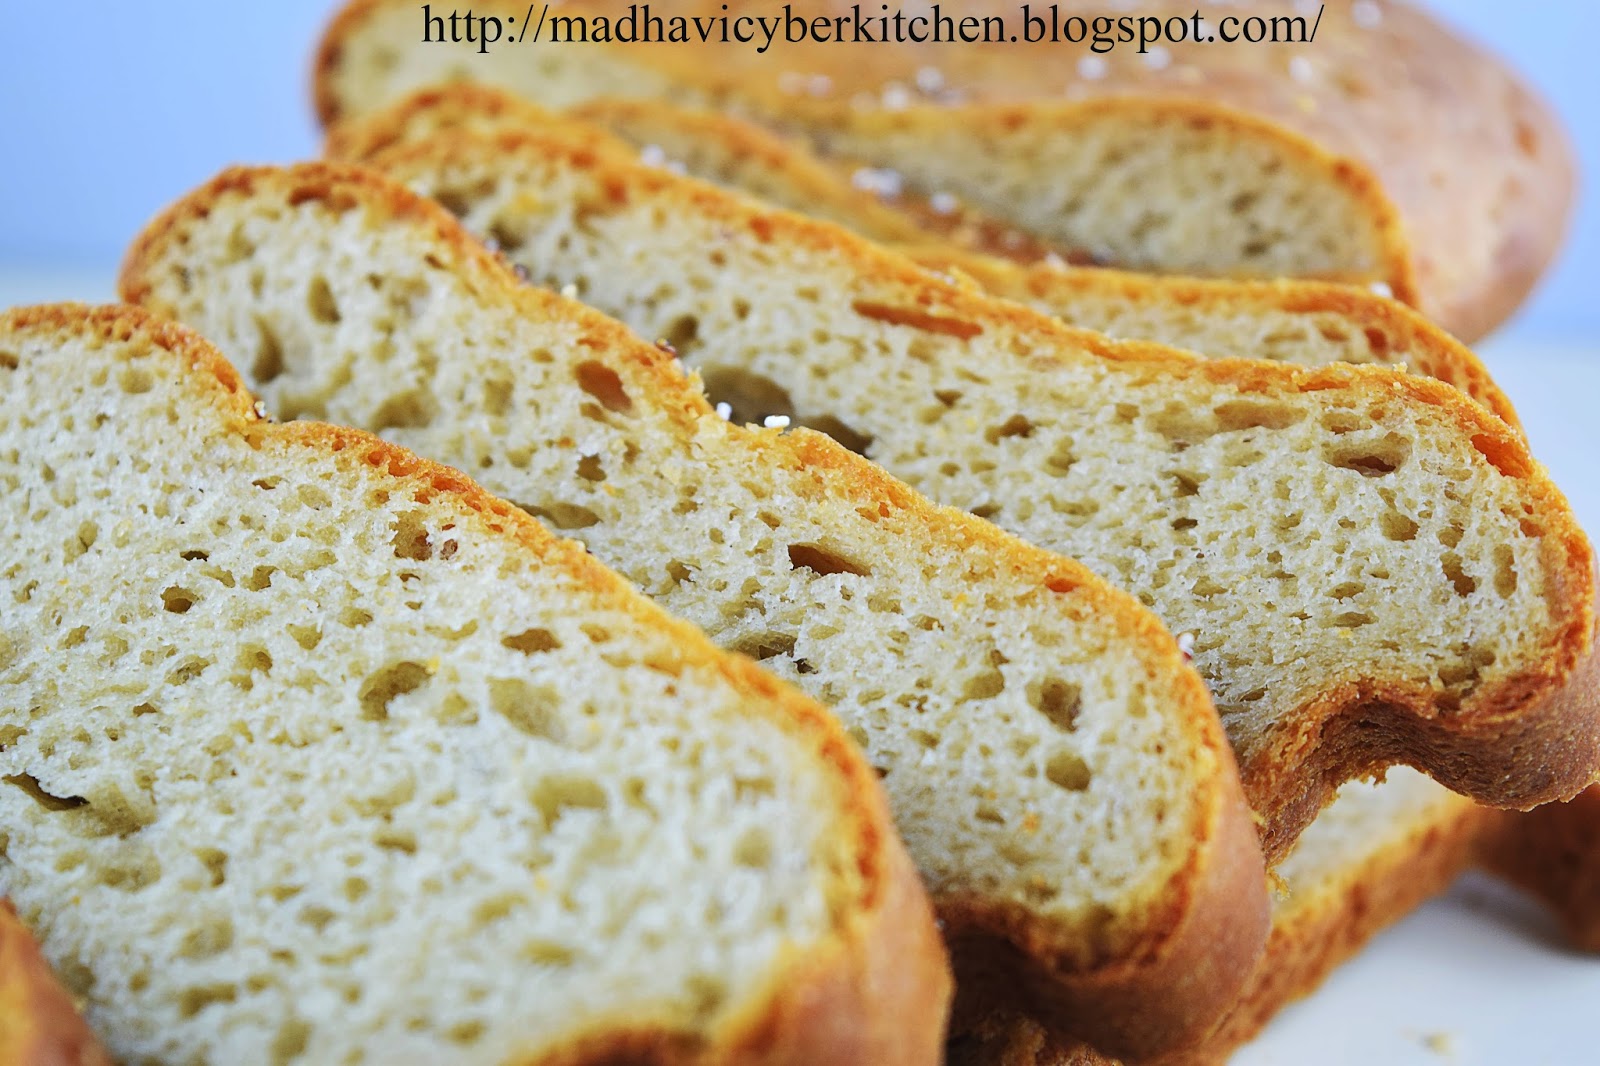
Amaranth Flour Bread


After switching the HFLC life style (diet) I pretty much restrict the wheat but, without wheat baking is almost impossible. The only option to continue the passion without compromising this life style is finding substitute to wheat so that I can mix with the wheat based flour in order to avoid the net gluten and calorie value. 

Also, In HFLC magnesium is (a very important mineral) recommended to take as supplement, as it’s not available in the regular food. But, amaranth is the only grain, rich in magnesium.  Without any trial and error, 53 % of all-purpose flour and 46% of amaranth flour, combination worked very well to produce perfect bread by all means.


Ingredient  :   2 cups of all-purpose flour     ;      1 ¾ cup of amaranth flour (rajgira)    ;      1 ¼ cup of warm milk       ;       2 tsp of instant yeast         ;      3 tbsp of sugar   ;     1 tsp of salt      ;   3 tbsp of soft butter     ;      amaranth grain popped for topping ( optional)

In a mixing bowl add warm milk, sugar, yeast mix well and keep aside. Mix well the salt, all-purpose flour and amaranth flour. Pour the yeast mixture into flour mix and knead until you have smooth and elastic dough. Add the soft butter and knead the dough further.


If required, add a little flour depends on the consistency of dough. Shape it into a ball and place it in a well-oiled bowl, turning it around to coat it well. Cover the bowl with damp cloth and allow the dough to rise until double in volume.

Gently deflate the dough and shape the dough into a greased loaf tin and cover the loaf tin with damp cloth for an second rise, allow to raise almost at the edges of your loaf tin. Sprinkle the popped amaranth grain on the top.

Transfer the loaf tine into 180°C pre-heated oven and bake about  40 to 50 minutes or till the bread is nice brown on top and sounds hollow when tapped. Spread the melted butter on the top and let it cool.

Enjoy the freshly baked bread with bone broth in the cold morning is a Divine.
Saturday, 4 June 2016

Rusk


From: Bha-cha1956 [mailto:bha********56@yahoo.co.in]
Sent: Monday, 16 May, 2016 10:20
To: madhavi.cyberkitchen@gmail.com
Cc:
Subject: Rusk recipe

Good Day !
Dear Mrs. Madhavi,
I have been following your blog for the past one year and I am impressed with the recipes….specially the bread varieties.
At the age of 60, I learned to bake!  Credits to your blog.  I love the crispy rusk with tea but, couldn’t find a recipe in the blog.  So, can you please let me know the simple bakery style rusk recipe please……..
God bless you and looking forward the rusk recipe soon.
With love,
Bharathi Chandran.
 

Dear Mrs. Bharathi. C,

Thank you for your kind words. “Age is not at all a factor to learn” - You are the perfect example! By the way, I am also big fan of Rusk-Tea combo.

Yes, still there is no Rusk recipe at MCK.  Since, you bake bread; Rusk is not at a big deal. Rusk is nothing but, baking the bread again. So, if you can bake any bread, it becomes Rusk.
However, here the bakery style rusk recipe exclusively for you :-)


Ingredient  :  3/4 cup of warm water           ;           1/4 tbsp of instant yeast ;         1/4 tbsp of sugar         ;          1 ½ cup of  all-purpose flour       ;      1/2 tsp of salt ;     2 tbsp of soft butter     ;  ½ tbsp. of cumin seed

Dissolve the sugar in a lukewarm water and sprinkle yeast over it and mix well. Add salt, butter then add flour and knead to soft dough. Cover the dough with damp cloth and leave it for an hour to rise.

After an hour, punch the dough, sprinkle the cumin seed and knead for about 5 minutes. Shape the dough so that it fits well in the greased baking loaf tin. Cover the loaf with damp cloth and leave it for second rise for about 45 minutes.


Transfer the loaf into 180°C pre-heated oven and bake for about for 30-40 minutes. (do not forget to brush the loaf with milk before, transferring into oven)

Remove the bread from the loaf and allow to cool. Slice into 1/4 inch thick and place the slices on the baking tray and transfer into the 150 °C pre-heated oven and bake till light brown and crisp.

Tip : Rusk can be crushed into powder (using electric blender)  this powder is known as breadcrumbs, used to make cutlets.


Friday, 22 April 2016

Coconut Buns (Chinese or Cocktail Buns)


This month challenge at we knead to bake #38 was to bake bun called Coconut Buns (Chinese or Cocktail Buns). The specialty of this bun is the filling. Yes, it’s a sweet bun, filled with a buttery, milky sweet coconut paste. The recipe adapted from here.

The Coconut Buns are tuned out very soft, sponge, tasty and appealing texture. I just loved it. I am sure you will also.


Ingredients (for the Bun Dough) :    2/3 cup of warm milk    ;     1 egg     ;   ¼ cup of sugar        ;       2 cup of all purpose flour      ;       1 ½ tbsp. of corn –starch    ;      1 tsp of instant yeast        ;         3/4 tsp of salt

Ingredients (for filling) :  50 gm butter (soft)        ;        1 ½ tbsp. of sugar       ;         1 ½ tbsp. of all purpose flour          ;           1/8 cup of milk powder          ;       1/3 cup of fresh coconut 

Ingredients (for Topping) :  2 tbsp of all purpose flour        ;         25 gm butter (soft)        ;       2 tsp of sugar     ;       5 – 10 tsp of  milk         ;         1 tbsp toasted sesame seeds for sprinkling

Lets begin with bun dough, add all the dough ingredients in to the kitchen processor bowl (or knead by hand) and knead together until you have soft and smooth dough that is just short of sticky. If required add little more flour if the dough is very sticky.


Shape the dough it into a ball shape and coat with oil.  Place the dough in an oiled bowl and cover with damp cloth and allow it to rise till double in volume. This may take about an hour or longer. (Depends on your room temperature)

Meanwhile, let’s prepare the filling and the topping. For the filling, mix all the filling ingredients together all the ingredients into a paste and keep aside. Similarly, mix all the topping ingredients (except sesame seeds) together into smooth paste. Transfer into to a piping bag.

Once the dough ready, Place it on the work surface and lightly sprinkle with flour. Knead the dough a few times to deflate it and then divide it into 6 equal portions.  Take the first portion of dough and flatten the dough out into a rough oval about 4” by 3”. Put about a tablespoon of the filling (1/6th portion) in the middle and then pinch together the two long edges of the oval over the filling and seal well, tucking the ends in to make a smooth oval shaped bun with rounded ends. 


Make sure the buns have been sealed well or the filling will leak out during baking. Similarly do the same with other portions of the dough as well.

Place the buns on a greased baking tray and cover loosely with a damp cloth for second rise. (may take about 40 minutes) Brush the buns with milk or egg wash.

Finally the topping the buns, using the piping bag with small hole nozzle pipe two lines of the topping across the length of the buns and sprinkle some of the sesame seeds on top of each bun.

Transfer the baking tray into 180°C pre heated oven and bake them for about 20 to 25 minutes or until it become golden brown. Allow them cool on racks. Serve warm or at room temperature with coffee or tea.


Thursday, 31 March 2016

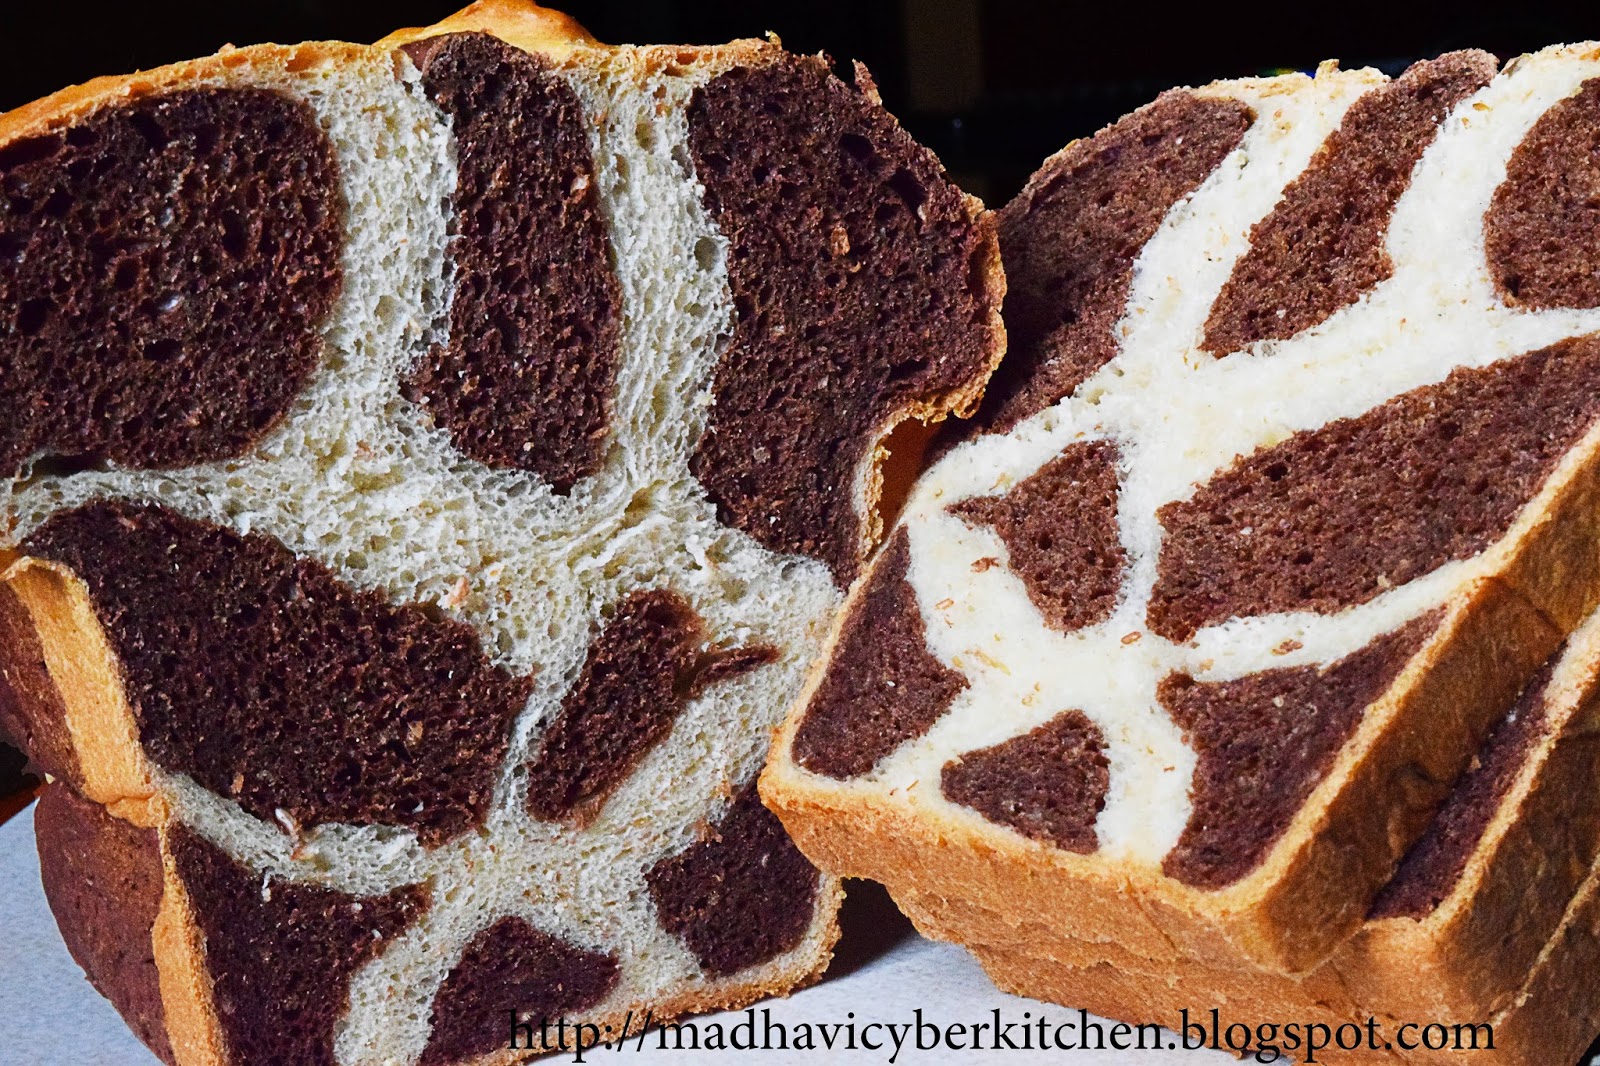
Giraffe Patch Bread


This month challenge at we knead to bake #37 was to create an attractive pattern on the bread. Instead of just baking usual bread, bit of creativity will make the baking more interesting. I wanted to have a Giraffe patch like pattern (very thin white patches on my bread) but, it was not. I know where, I went wrong. My loaf pan is not wide enough to accommodate the dough.

However, it turned out very soft, sponge and good texture bread. The pattern was inspired from here.


Ingredients :     2 cups all purpose flour       ;      1 cup whole wheat flour      ;      2/3 cup of warm milk     ;     1/2 cup of warm water     ;      50 gms of butter melted      ;     3 tbsp of sugar     ;      1 tsp of salt     ;      2 tsp of instant yeast.      ;      4 to 5 tbsp of coco powder dissolved in  3 tbsp of milk  (for the darker brown colored dough)   ;    little oil    ;  little milk for brushing

Procedure :  combine all of the ingredients (except coco powder) in a large bowl and stir until the dough starts to leave the sides of the bowl. Transfer the dough to a lightly greased surface and knead for about 8 – 10 minutes by hand (if required, oil your hands) or until it become smooth and supple.  


With rolling pin roll the dough into circle shape and divide into three equal parts. Take the one part of the dough and place it on the lightly greased bowl and cover with damp cloth and allow it to raise double in volume. (may take about 45 to 60 min)

Take the other two parts of the dough and add the cocoa powder (dissolved in the 3 tbsp of milk) and knead well until to form a uniform colour. (This is the dark coloured dough for the giraffe patches) Shape it into a ball and place it in a lightly greased bowl and cover with damp cloth and allow it to raise double in volume.

Gently deflate the coco dough and then divide into 4 equal portions. With hand roll the dough like rope or sausage shape. You will get 4 same size rope(s) like dough.


Similarly, deflate the white dough and then divide into 4 equal portions. With rolling pin roll the dough into oval shape. You will get the 4 equal oval shapes. Try to make similar length of the coco dough and the width is just enough to cover the coco dough.

Now, place the rope shaped coco dough on the mid of oval shaped white dough and cover the coco dough. i.e enclose the rope shaped coco dough by the white dough and seal the end of the white dough. Gently roll on the dusted work surface to form a rope (like our house hold electrical wire, the inner copper conductor is surrounded or enclosed by a plastic insulator. Just imagine, the coco dough is the copper wire and the plastic insulator is the white dough)

Now, you should have 4 similar length and width rope shaped dough. Just by dividing into two equal half’s (the length depends on your loaf tin) you will get eight pieces of dough roll.
Arrange the dough rolls in the greased loaf tin by placing 3 rolls at the bottom. two rolls over the 3 forms the middle layer and 3 more rolls on the 2 forms the top layer. Cover the loaf tin by damp cloth for the second rise, for about 45 minutes. Brush the dough with milk.


Transfer the loaf tin into a 180°C preheated oven for about 30 minutes or until its light golden brown and done. Allow to cool it on a rack before slicing. Store the bread in a plastic bag at room temperature for several days; freeze for longer storage.